If you have been using the same stash of drum loops for a while, they can feel a little old and uninspiring when dropping them into a new project. Never fear, we’ve got you covered with this month’s Ableton tip from Liveschool trainer Adam Maggs. This workflow uses the Gate device to chop, rearrange, and remix your loops together into entirely new grooves and variations. What’s even better is that it can all be done on the fly, perfect for live performance and jamming with a controller like the Push 2.
Sidechaining with the Gate device: How it works
The Gate is an effect that only allows audio signal to pass through if it is above the user-determined Threshold volume level. It can be used to eliminate low-level noise in an audio file, or cut the tails of notes and drum hits after the initial transient.
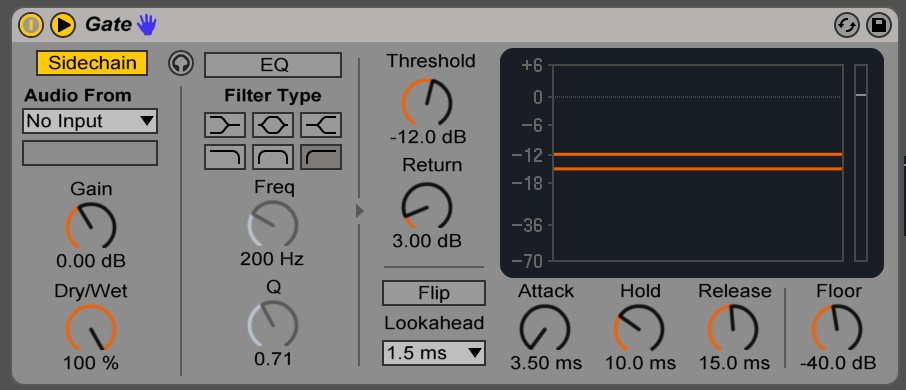
The  button on the expands the Gate device so that the sidechain parameter can be turned on. When enabled, the opening and closing of the gate is controlled by the volume of an audio input, rather than the audio from the channel itself.
Setting up a MIDI controlled gate
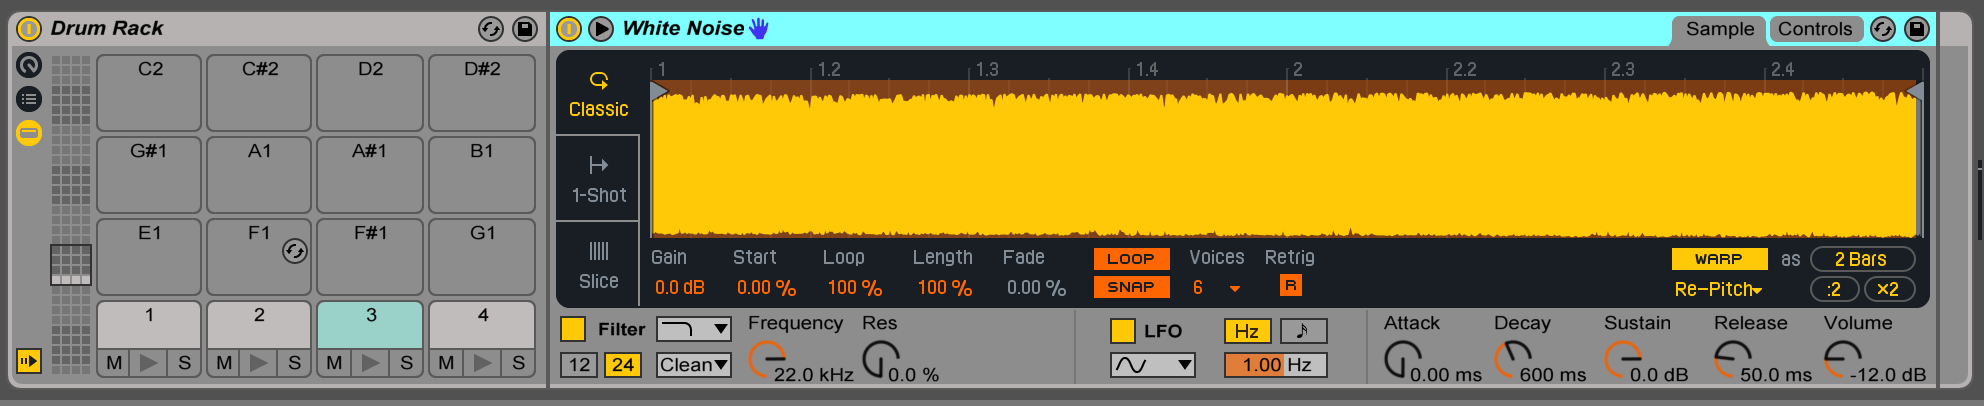
In this trick, a Simpler instrument loaded with a sample of white noise functions as a control signal, opening and closing the gate via its sidechain audio input. With this routing, any MIDI notes on the Simpler channel will open the gate.
Here’s how to set this up in arrangement view:
1. Download a white noise sample.

2. Drag White Noise.aif onto a MIDI channel to create a Simpler instrument.
3. Drag a drum loop onto an audio channel, and place a Gate on this channel.
4. Expand the Gate using the button and enable sidechain.
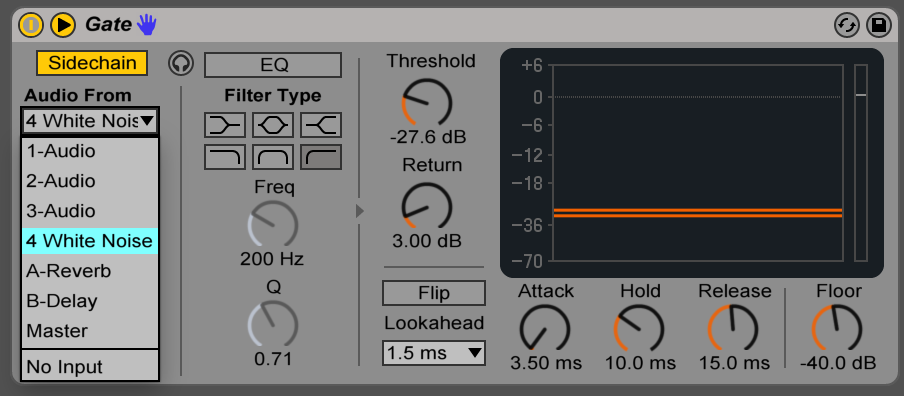
5. Select the White Noise/Simpler channel from the drop down menu.
6. Create a MIDI clip the same length as your drum loop, and enable your arrangement loop markers around the loop.
7. Deactivate the Simpler channel by clicking the yellow box containing the channel number.
8. While the clip is playing, experiment with adding notes to your Simpler MIDI clip. The Gate on the drum loop channel will open wherever there is a note.

9. Experiment with the Gate parameters, such as “hold” and “decay”. This will control how long the gate stays open after receiving a note.
10. Turning the “floor” parameter all the way down to “-inf” will make sure loops are only heard when the gates receive a MIDI note.
Extended Techniques
Dialling in the Groove
With a few different loops in the one project, it can help to apply the same groove settings to each clip so that they lock in together rhythmically.
1. Drop your desired loops into arrangement view.
2. Pick one loop which will be your ‘master groove’. The groove in this instance refers to the timing and rhythmic feel of the clip.
3. Right click on your elected loop and click ‘extract groove’. The loop’s name will now appear in the groove pool. Note: the shortcut to show/hide the groove pool is [ ⌘ + Opt + G ]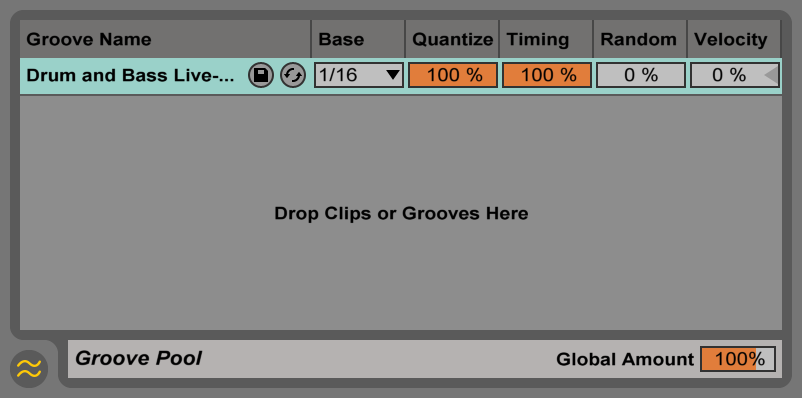
4. Set both the “Quantize” parameter and “Timing” parameter to 100% as shown above.
5. Shift-select your other drum loop clips, and select your drum groove from the “Groove” drop down menu in the clip box:
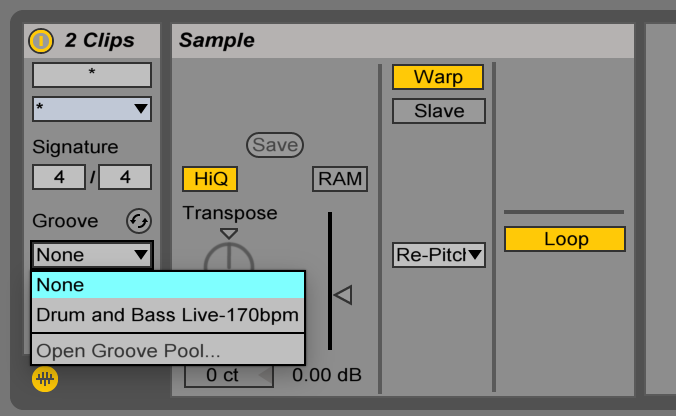
6. Apply the same groove to any new MIDI trigger clip and your triggers and loops will all be tightly grooving together.
Adding Effects
Adding some more devices brings so much more possibility…
Audio effects
- Add any Audio Effect devices to the drum loop tracks. Depending on the effect, it could make a big difference if you add it either before or after the Gate devices – particularly for effects that have long tails, such as reverbs, delays, resonators, etc.
- Try applying the same method to effects on the Return tracks. For example, a Gate after a Reverb on a return track will create a “gated reverb” effect. Alternatively, place the reverb after the gate for a more natural reverb tail. To test the result, the most noticeable positions for the MIDI notes will likely be where the snares are.
MIDI Effects
- Adding MIDI Effect devices to the MIDI track will alter the pattern of MIDI triggers that the gates are sent.
- The Random device can be turned on / off to create random drum fills (if you dial in high Chance and low Choices).
- The Note Length device:turn this device on to instantly make all triggers really short or long (determined by the Length parameter), then turn it off to go back to your original pattern lengths. For quantized results, toggle the Time button to switch to Sync mode.
Choked Drum Rack
Choke Groups are a feature of Drum Racks that allow you to set up “choking” interactions between samples in the rack. If any two samples are in the same choke group, then only one of those samples can play at any given time. This can result in a clean / tight sounding groove, because no notes can overlap.
Here’s how to set it up:
- Opening the i/o panel of the Drum Rack reveals a parameter on every chain called Choke.
- Select all the chains in the list and change the Choke from None to 1, to assign them all to Choke Group 1.
- Now, only one drum rack pad can play at any time. Try drawing some overlapping notes in your MIDI clip – you’ll hear that one drum loop will now cut the other off.
Using Gates for Effects
Another application of this principle is to trigger many different effects chains on the one loop. This can create complex and unpredictable results quickly and easily.
1. Create a drum rack with multiple instances of the white noise sample assigned to the pads. This will be the trigger channel. For this example we will use four triggers for four effects chains.
2. In session view, drop a drum loop clip on an audio channel. This is the channel that will be put through the effects chains.
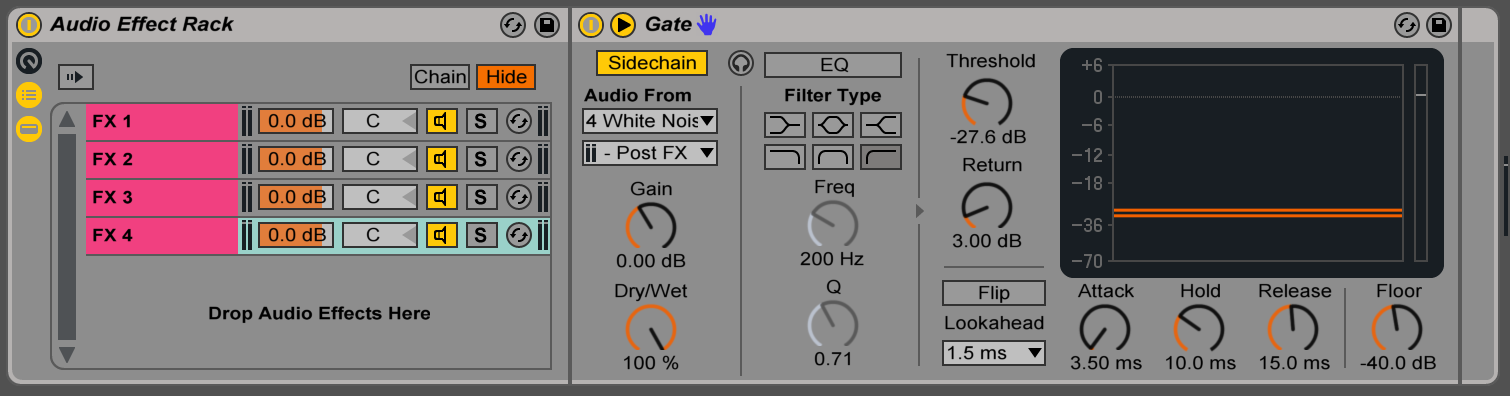
3. On the drum loop channel, create an audio effects rack and drop a gate into it. Turn the “floor” parameter all the way down. Duplicate this chain four times.
4. Ensure the routing for each of the four gates is from four separate triggers from the trigger channel. This will allow the effects to be toggled independent of each other. For the first gate, select Audio From the first trigger in the Drum Rack. For the second chain, the second trigger and so on.
5. On each chain, select different combinations of effects to trigger. Delays, Resonators, Reverbs are a good place to start. As are Distortions (such as the devices named overdrive, amp, redux, dynamic tube, or saturator)
6. Start the drum loop and a MIDI clip on your trigger channel. MIDI notes in the clip will open their corresponding gate, triggering the effects chain for the duration of the note.
This is an idea that opens many possibilities — Using a Push or MIDI controller to control the trigger channel can make for a dynamic effects performance tool, and experimenting with different effects, altering MIDI patterns, and placing the effects chains before and after the gates can create limitless variations.
More Tips + Tricks tutorials
Subscribe to our email newsletter for all tutorials
Subscribe to our Youtube channel for video tutorials
Check out the Music Courses we run