Next up for our monthly Tips + Tricks tutorial we have Liveschool trainer George Nicholas on board to show us how to sample kick drums from almost any track.
Extracting a clean drum sample without bleed from other instruments is usually only possible when there is nothing else playing in the mix. What sets this particular method apart is that it can be used to extract a clean sample from full tracks, or moments where other instruments are playing over the top of the desired kick.
Tutorial Walkthrough
- Select your source material and find a kick drum in a section with sparse arrangement, or a point where there is as little harmonic material layered over the kick as possible. Cut out the kick sample from its transient to tail. Duplicate this channel three times.
- Drop an EQ Three on each channel. On one, isolate the kick’s lows, the next, isolate the mids, and on the last, the highs. The kick has now been divided into three parts, its sub, thump, and click.
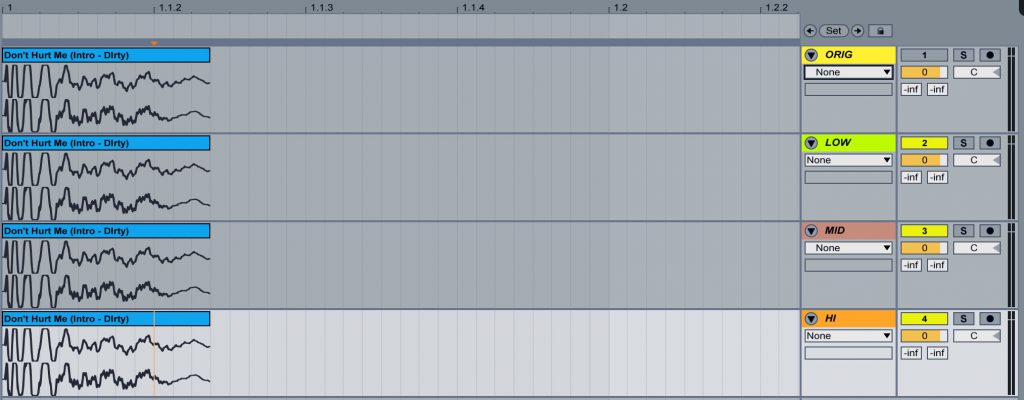
The first channel is used as a reference, and the three others labelled according to their frequency band.
- Freeze and Flatten each channel
- Edit the length of each channel’s sample. Leave the tail of the lows channel long, cut the mids shorter for the thump, and takes only the transient of the highs for a very short click.
- Tidy the decays of each layer using fades to avoid any unwanted clicks and artefacts.
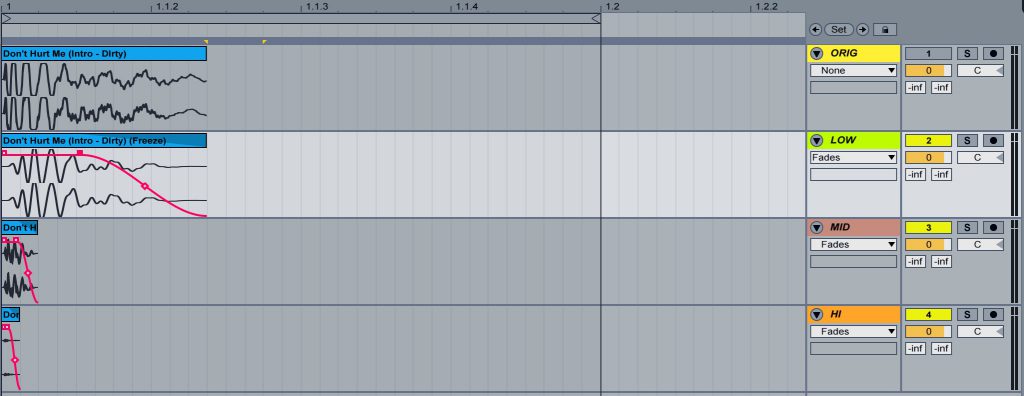
The tail of the kick can be adjusted to taste using Fades
The setup within Live
George uses a few key tools to help isolate the kick from the rest of the track. By dialling in a few parameters, the kick can be sampled effectively without a drastic change to its character:
EQ Three
Control the crossover point
- The sub, thud, and click will be focussed at different frequency bands depending on the source material. Because of this, being aware of the crossover frequencies is important to ensure the kick is cut cleanly from the source.
- For a good starting point, change your Low and Mid audio channels’ EQ Three FreqLow crossover to ~120hz.
- On a track by track basis, dropping a Spectrum on your channel to examine where your kick is focussed on the frequency spectrum can inform where you decide to make your crossover point in EQ Three.
Activate Flat Response
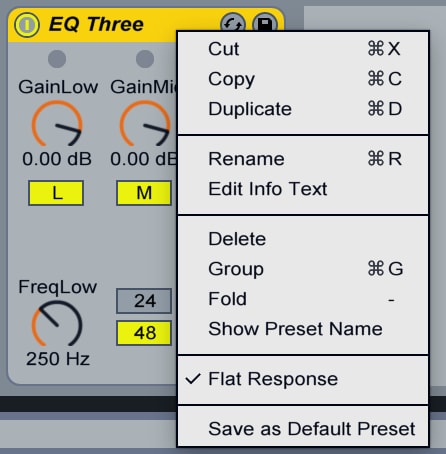
- For this application, we want to use EQ Three to split our input signal up into three bands with absolute transparency. To do this, Control + Click on the title bar of EQ Three and ensure Activate Flat Response is checked in the drop down menu.
- EQ Three is engineered to sound like a good analog filter cascade akin to a DJ mixer, it is built for creative applications rather than precise mixing. Because of this, if Flat response is off, EQ Three will add colour to the sound.
Freeze and Flatten
- Once an EQ Three has been dropped onto each channel and the frequency bands assigned, select all channels, Control + Click > Freeze, then Control + Click > Flatten.
- The EQ Three will be written into the audio files so that you can now see how the isolated frequency bands have affected the sample. This will make it easier to chop the sound up using Fades.
Setting up Fades
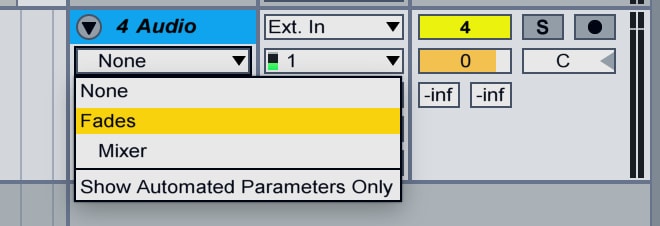
You can find the fades in the Fade/Device chooser found under the track name of each channel.
- Use fades at end of the sample to avoid the clicks and pops that occur when cutting up audio. This is especially true for the Low channel. Avoid placing any fades at the start of the sample so that the full transient is retained.
- Option+⌘+F is the shortcut to show fades on a channel.
- Remember when applying the Fades that the sub should have the longest decay, the mids are used for a marginally longer thud, and high frequencies are capturing the transient, and will be short and clicky.
More Tips + Tricks tutorials
If you want to check out more tutorials like this, we have covered a range of techniques over the last few months to help your creative flow. Just recently Liveschool trainer Josh Panakera Molony ran us through this method of adding human feel to sequenced drums, and Swindail introduced us to his Traktor & Ableton setup.
If you want to step up your production, check out our comprehensive Produce Music course. Upcoming course intakes are found here.