Anthony Garvin, General Manager at Australia’s largest recording facilities, Studios 301, recently decided he wanted to know exactly how phasers work – what is it that makes these effects stand out so much in a mix? After researching the components used to create a phaser, Anthony used this knowledge to build one from scratch using everyday devices inside Ableton Live.
In this video tutorial Anthony uncovers the simple tricks these effects employ to achieve such a dramatic sound, while showing you how to build one – and he’s even put the racks up for download here too.
Watch the video:
Download the Racks:
There are 2 racks in this download – one Phaser created using EQ Eight devices and one Phaser using Auto Filters.
Requires: Ableton Suite 9 and Max 6.1 or any version of Live 9 plus the Max For Live add-on. Don’t have either? Get the free 30-day license.
How Phasers Work
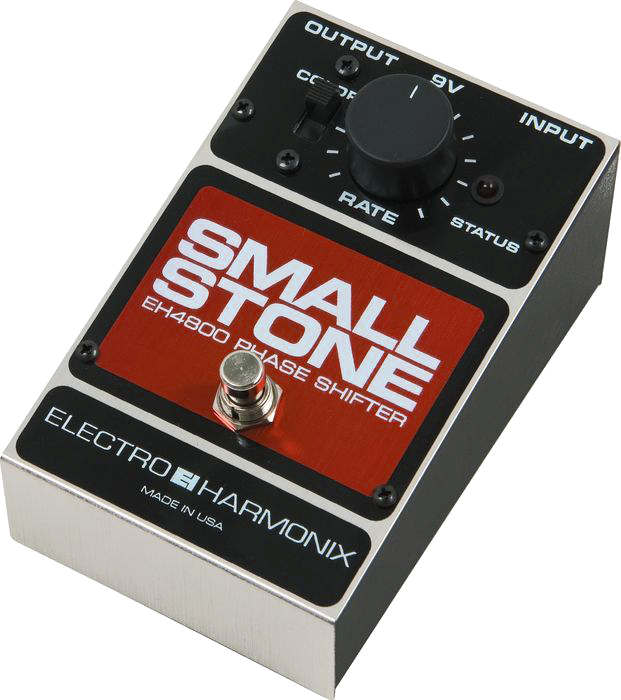
By definition, a phaser is in essence an advanced and dangerous weapon which fires a stream of phased particles, capable of stunning or even killing an opponent….just kidding! A phaser (also known as phase shifter) is of course an audio effect that is often employed to create a ‘swooshing’ or ‘sweeping’ sound. Famous examples of hardware phaser units include the Mu-Tron BiPhase, the Electro Harmonix Small Stone and the phaser within the Ensoniq DP/4 Multi-Effects unit (used extensively by Daft Punk). Words can only do so much in describing this, so we’ve collated some great musical examples to showcase how a phaser can sound in action.
Examples of Phasers in Music
First up, this is Daft Punk‘s remix of Scott Grooves – Mothership Reconnection. That massive ‘swooshing’ happening at 1:34 into the track and throughout is unmistakably the sound of of the Ensoniq DP4‘s phaser. Take a listen here.
Next audio example of a phaser in action is Jean Michel-Jarre‘s classic synthesizer track ‘Oxygene Pt I‘. The first sound you hear in the track is an Eminent 310 Unique home organ run through the Electro Harmonix Small Stone phaser. Take a listen here.
One more example, at 0:09 in Radiohead’s Paranoid Android, Jonny Greenwood‘s guitar track (panned left), has some pretty serious phaser happening. This is likely again the Electro Harmonix Small Stone phaser. Take a listen here.
Modulation Effects Explained
A phaser is considered a ‘modulation effect’, a broad term that is used to describe a family of effect-types that includes phasers, flangers and chorus. Overall these effects sound like they are moving or constantly changing. For an exact definition, modulation describes any instance in which the audible signal (known as the carrier) is being modified (modulated) by another signal (known as the modulator).
Under the hood, all three of these modulation effects use slightly different means to manipulate the signal phase, the EQ and / or a time delay. It’s the sweeping of these parameters that earmarks the effects as ‘modulation effects’. While you could move these parameters by hand and achieve the effect, most commonly an LFO (low frequency oscillator) is employed to control the speed and depth of the sweeping. In this instance then, the LFO is the modulator, while the audible signal is the carrier. While flangers and chorus usually rely on delay to create this effect, the phaser is unique because it employs a chain of ‘all pass filters’ to generate frequency notches and peaks. Sweeping (moving) these notches / peaks creates the signature sound of a phaser.
All-Pass Filters
All-pass filters are an essential component element for how phasers work – and they are easy to make in Ableton Live. First, consider this: if you apply a high-pass filter to a sound (only the higher frequencies will be heard) or a low-pass filter (only the lower frequencies will be heard) – then imagine what would happen if you played both of these sounds at the same time (aka, “in parallel”)? If you guessed that it would sound no different to the original signal because we’d be hearing the highs and the lows, then you’d be right. An all-pass filter is basically this – with the extra step of flipping the phase on one of those signals.
Phase-flipping
To understand the concept of Phase, it is important to first understand how to read audio waveforms. If you take any audio signal and look at it’s waveform, you’ll see a rising and falling pattern (which will be different for every sound) as well as a dead-straight reference line running straight through the centre. This straight line is called the Zero Line and it represents the speaker at “resting position”. Any movement of the waveform above the line is a positive movement (the speaker pushing outwards), and any portion of the waveform that travels below the line is a negative movement (the speaker pulling inwards), and anywhere the waveform intersects the Zero Line is called a Zero Crossing.
Now that you know this, it’s easy to understand phase: if you take one sound (let’s say it’s first waveform movement goes up then down) and then you copy this sound onto another track and play them together (aka “in parallel”) then both of these sounds will be moving in exactly the same way at exactly the same time. This is known as being in-phase. Anything other than completely in-phase is known as out-of-phase. If you took this example and made one of these signals move in the exact opposite direction at the exact same time then the two signals are completely out of phase, or phase-flipped.
Phase-flipping can be achieved within Ableton Live using the Utility device and activating both Phase buttons on the bottom of the device (one flips the phase of the left channel, the other flips the phase of the right channel). Again, an all-pass filter combines a high passed version of the sound, with a low-passed version of the sound – but with one of those signals phase-flipped in comparison to the other.
Parallel Effect Rack
In the video tutorial Anthony builds his phaser by placing his devices into an audio effect rack, so he can run the signals in parallel. To do this, he uses multiple chains within the rack: on one he places the high-pass filter, and on another chain places the low-pass filter. The incoming sound goes into both chains separately where they are each filtered and then they combine at the output. He then places a Utility device onto one of these chains so he can flip the phase of that one part of the signal.
Phase-shifting
So now you understand the components of a phaser, and how they were created using an Audio Effect Rack within Ableton Live – now it’s time to put the all-important finishing touches.
A phase-shifter (the proper name for a phaser) is made by taking an all-pass filter and automating it’s crossover frequency (the point at which the high and low passes meet, and where the phase-flipping occurs) so that it moves. Usually this movement is controlled by an LFO. In the tutorial, Anthony achieves this using Racks and Max For Live’s LFO.
Step-by -step instructions:
- First, assign the cut-off frequency of both filters within the all-pass filter to one macro control. Now we have control over the frequency at which the phase-flipping occurs.
- Moving this macro dial now shifts the position that the phase-flipping occurs, so now he have the possibility of phase-shifting. We could move this dial manually, or even with automation but, to replicate a real phaser, we can use the LFO device included in Max For Live and assign it to control the Macro dial.
As a result of these 2 steps, the phase-position now shifts endlessly with the repeated rising and falling of the LFO control – and we have now built a Phase-shifter!
Sends and Returns
Now we have a fully functioning phaser, it’s time to set things up so we can blend this “phased” sound with the original sound, and we can do this using Sends and Returns.
Step-by-step instructions:
- Place your Phaser device on a return track
- Leave the original un-effected sound on it’s own audio track
- Now use the send dial from the audio track to send sound into the Phaser.
The main benefit of this kind of setup is we can use the volume of the return track to vary how much Phased sound is blended with the original. Interesting point: just like using the chains on an audio effect rack, using Sends and Returns is another kind of “parallel” audio routing – both of them can play at the same time.
Phaser Feeding-back via Sends & Returns
Another phaser feature that Anthony deftly recreates in his video is feedback. In the example in this tutorial, Anthony has a phase-shifting signal on the return track then feeds that signal back into itself (the phaser’s output, back into it’s input), and this creates a resonance effect. As the feedback increases, it further accentuates the notches and peaks as they sweep, further enhancing the “sound” of the phaser in action.
In Ableton Live you can make the return tracks feed-back on themselves. If you look at the return tracks you will notice they also have send dials on them, but they are deactivated by default. This is so people (particularly those that don’t know any better) don’t accidentally turn them up and create uncontrollable screeching in their headphones. But these sends are there so you can (while being careful with levels) feed the return signal back into itself.
Step-by-step instructions:
- Locate the return track that contains your phaser (lets say it is Return track “A”)
- Right click the Send dial (let’s say Send “A”) to activate it
- Being very careful of your speakers and ears, gradually turn up the Send amount
Subscribe to our newsletter to keep up with our latest free tutorials, samples, video interviews and more.
Learn more about Mixjng & Mastering.


