Getting the main section of your song (a.k.a. the chorus) to sound bigger than the other sections is something a lot of music-makers don’t consider until the mixing stage. However, while there are a few things you can do in the mix, most of what makes a chorus sound bigger really comes down to your arrangement.
Even if you’re not writing music that clearly has a verse / chorus structure, there’s probably still a section of the song that you want to sound bigger. This section can go by many names depending on what style you’re writing in, for example we could also use the climax or the drop. The common thread is that the section that should feel like the peak of your track. For this article, we’re going to use the generalist label of the chorus to describe this idea.
So here goes, below are six methods that’ll have you well on the way to being able to take your chorus up a notch.
Less is more – making it relatively HUGE
The energy of a chorus for the listener is going to be perceived relatively to the energy of the song’s other sections – so for the chorus to sound huge, the other sections needs to sound somewhere less-than-huge.
It can’t be stressed enough that this is crucial to making you chorus sound bigger. It also applies to all of the other tips in this article – you’ve got to leave a little room for the chorus to be bigger than the other sections.
One way to approach this when mixing is to mix the chorus first – making it sound as huge and energetic as you can. Then, when you’re mixing the other sections of the song, make sure to keep referencing the chorus so you can keep the energy level of the other sections below that of the chorus.

Making your chorus sound relatively huge is not all down to the mix though…
When arranging your song, think about the elements that are in both the verse and the chorus – perhaps you can remove some of these from the verse and save them for the chorus – which will make your chorus sound relatively fuller.
Here’s a great example of the less is more approach in action Flume’s track Say Nothing. In Say Nothing, Flume has entirely removed the drums from the verses and saved them for the chorus which makes the chorus sound huge in contrast.
Thinned Frequencies
An age-old yet eternally useful arrangement technique is to remove a lot of the low end frequencies for 1-4 bars before the chorus. This can mean removing the kick drum, the bass, or automating a high pass filter to remove the low frequencies. When the chorus kicks in, bring back in the low frequencies you had removed and the chorus will have a lot more impact and sound relatively bigger than the section before it.
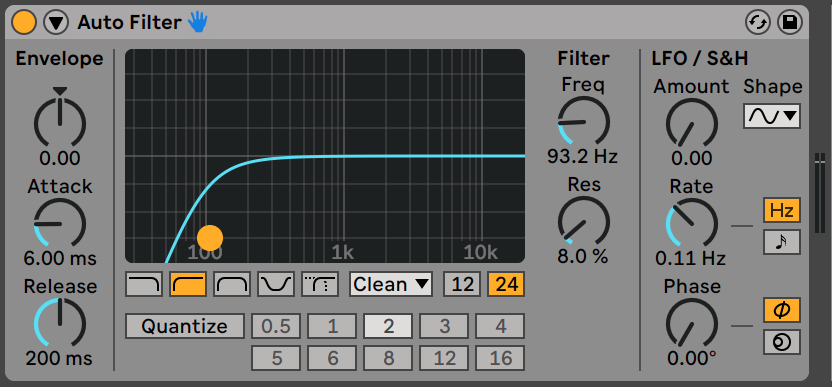
A high pass filter cuts some of the low frequencies in the leadup to a chorus. When the filter is turned off at the start of the chorus, the section drops in with a greater perceived intensity.
Calvin Harris’ project Love Regenerator throws back to 90s house sounds, a time when filters took centre stage in electronic pop music. To fit with the aesthetic of the time, his tune We Can Come Together has great use of filters for impact. The contrast between the build and drop in We Can Come Together is massive, with the build from 0:31 featuring a lighter, disco house influenced kick. At 0:50 we hear a bandpass filter going into action, cutting out both lows and highs, filtering the sound down to a tiny frequency range before opening back up at 1:00 a massive drop into a sub heavy tech-house style groove.
High Frequencies
An extra burst of high frequencies can go a long way to making your chorus sound more exciting and full.
There’s plenty of ways to make this happen, but here’s a few simple ideas to get you started:
- Crash cymbals are full of high frequencies and when placed right can give your chorus more impact. First up, try using a crash symbol on the downbeat (the first beat) of your chorus. Then, if you’re already using a crash in other sections, try making it happen twice as regularly in the chorus, i.e. if you’re using a crash symbol every 16 bars in the verse, make it happen every 4 bars in the chorus.
- If you’re using a closed hi-hat through the other sections, try using a more open hi-hat sound in the chorus. While both usually have plenty of high frequencies, the extra sustain of a more open hi-hat will increase the overall high frequency content.
- White noise effects also work well in creating a rush of high frequency energy. Try using white noise sweeps (riser and fall effects) placed strategically to work with the ebb and flow of your chorus.
- You can also use sustained white noise (not sweeping) to achieve this. When doing this, typically you’ll want to remove some of the low frequencies so that it doesn’t take up valuable room in your bass frequency range. Further to this, try adding some rhythmic volume modulation to the sustained white noise – for example you could use sidechain compression on the white noise triggered by the kick (or another source), use an LFO to modulate the volume, a sequenced gate effect (use a drum sample to trigger it via it’s sidechain input) or even a tremelo effect (which is possible with Live’s Auto-Pan audio effect – see here).
This example from the all time classic Shooting Stars by Bag Raiders shows the power of high frequencies. The main drop at 2:18 re-introduces the tambourine loop that has appeared in the intro – this time combined with high frequency synths (and a aeroplane noise!) give this tune one of the greatest lifts in dance music.
Doubling Up / Layering
Layering doubled parts can make the elements of your song sound larger than life. This is a particularly common technique for vocals and guitars in particular, but can also work well on synths.
To double something in this context just means to add a second layer. In the case of a vocal, a common way to make use of doubling is to get two great vocal takes and layer them on top of each other in the chorus, then drop back to just a single layer in the other sections. When a vocal or other instrument is doubled like this, the slight variations in pitch, timing and timbre make the layered vocal sound much bigger than a single vocal take on it’s own. Also just to clarify, doubling is not the same as duplicating a sound – when layering sound like this it’s the variation between the layers that creates the larger-than-life effect.
There’s plenty of other ways to make use of doubling and you can go easily beyond doubling to create a stacked sound (lots of layers) – for example using a doubled vocal in the verse, but then one-upping it in the chorus by using a stacked vocal of three or more layers plus additional harmonies layered in.
Break My Heart by Dua Lipa is a good example of contrast between single takes and layered vocals. The verse features one layer of vocals with an occasional doubled part for accent, the chorus lifts into a vocal with a layered harmony. This an adds an excellent layer of depth and excitement to the chorus.
Going Wide
Another way to get the chorus sounding bigger is to make your stereo image wider. This can be done by panning elements further to the sides than they are in the verse, or by introducing new elements in the chorus that are heavily panned.
This is often used in combination with layering (doubling), by panning the added layers to create a wider sound. A simple example of this to use a single track guitar in the verse which is in mono (centre), then in the chorus add a second guitar track (a double) and pan one guitar to the left and the other to the right.
A simple mixing trick that you can also try is to automate a stereo widening plug in. For this I like to use Brainworx’s Control plugin. To do this, just automate the stereo widening to jump to somewhere 101-110% in the chorus and then move to 90-100% in the songs other sections. Generally this should only done very subtly, but it’s a technique that can get you another 5% toward making your chorus sound huge.
A great example of stereo width providing contrast happens in Taylor Swift’s Exile, featuring Bon Iver. The song is all about differences of perspectives and this is perfectly illustrated in the mix. Swift’s vocal is relatively centred in the stereo field, then at 2:15 Bon Iver comes through with a vocal that pans way out into the sides of the stereo field, giving the moment massive impact – even more so given that there are no drums to take focus from the vocals.
Adding extra percussion
Adding extra rhythmic elements like shakers, extra hi-hats and tambourines can make the chorus sound more full, as well as adding a feeling of drive and pace. These don’t necessarily need to be loud in the mix, even at a barely audible volume in the mix they can make it feel bigger and more driving.
This can be combined with the point above of “going wide” by heavily panning the percussive elements you’re adding – i.e. hard panning a tambourine to the left and a shaker to right will not only add rhythm and pace to the chorus, but will also make the stereo image sound bigger – two birds with one stone.
In The Weeknd’s 80s banger Blinding Lights we can hear a good example of how one extra percussion layer can bring some more energy in a subtle way. At 1:26 we hear a left panned hi-hat come in playing a simple 16th rhythm which adds just a tiny amount of drive to the chorus. it might be small but it makes the difference!
And beyond…
There are of course more techniques that can be used to make your chorus seem bigger – key modulation, extra distortion, using a larger kick drum, automating the overall volume +2dB, or moving an instrument or two (especially the vocal) into a higher octave – just to name a few.
Next time you need a section to feel like it takes things up a notch, try some of these ideas out – I hope it helps. If you’re up for learning more techniques to help turn your ideas into complete tracks, do check out Liveschool’s Mixing & Mastering, Arrangement, and Music Theory courses.