Tom from Panama (Future Classic) continues his look behind the scenes of Panama’s live performance set-up.
In this – the third and final instalment, Tom explains how Panama use Ableton Live to control their hardware analog synths live on-stage.
In part 2 of this series I discussed how Ableton Live has replaced some hardware in our live show, which in turn has made our on-stage operations much less complex and cut down our set up time.
However, there’s some hardware gear we’d really rather not sacrifice – for example, our dear analog hardware synths. Ableton Live is still intrinsically linked to controlling hardware synths for us on-stage though, allowing us maximum flexibility in programming and performing our sets live – as I’ll explain here.
Using MIDI CC messages live
In our live shows I use two analog hardware synths: a Moog Taurus III bass synth, and a Dave Smith Instruments Mopho x4.
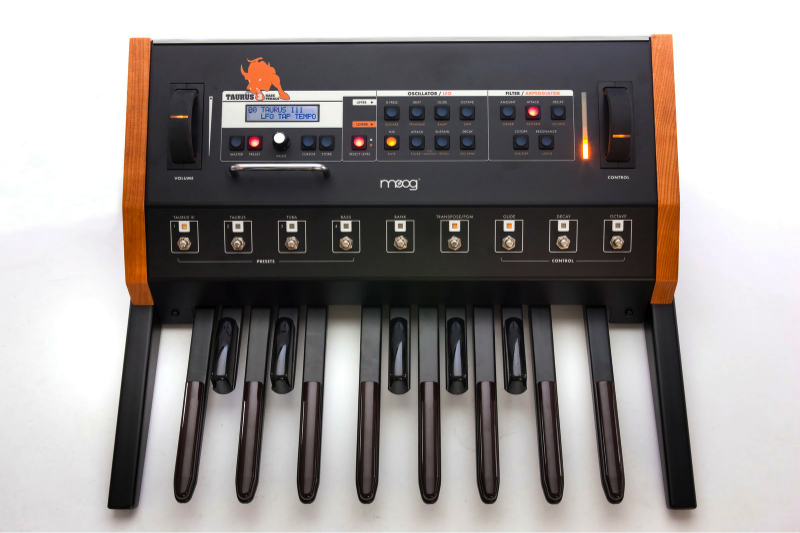
Moog Taurus III Bass Pedals = huge bass sounds
The Taurus III (pictured right) is an absolute beast of a bass synth, though it is somewhat limited by the fact that there are only 12 physical pedals (one octave) to play, with an “Octave” switch to shift the pedals up to a second octave, allowing a total of 2 playable octaves.
For most Panama tracks, it’s completely viable to play the bass lines using one octave, or to interchange between two octaves using the Octave switch. However in the bridge of the track, “It’s Not Over”, the bass line spans over two octaves and it’s rhythmically awkward to use the Octave switch between the short note lengths. Have a quick listen to the bassline in question at 2:10 in the soundcloud player below.
So this is where MIDI CC came to the rescue to make the bass-line much easier to play live!

After a quick look in the Moog Taurus III’s manual, I found the corresponding MIDI CC number for the Octave switch (CC 89) and its relative values required to switch between octaves. I then automated these values within a MIDI clip’s envelope to trigger octave changes as required with the track’s timing. This MIDI clip is launched in Live when I have to play that bassline you heard above, and sends the envelope changes to the Taurus’ octave switch (CC89). This negates the need to kick the octave switch every single second between notes and allows me to focus on playing the bass line itself.
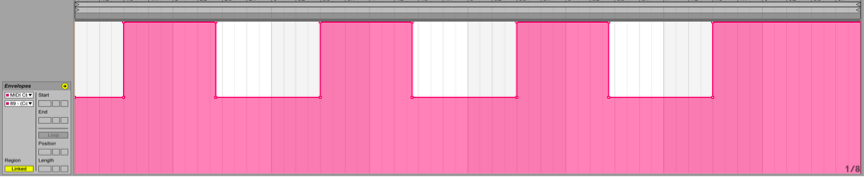
MIDI CC 89 = “Octave” switch on the Tauras synth. CC 89’s values: 63 = Octave shift down, 127 = Octave shift up.
We also use MIDI CC messages to control a variety of other parameters on the Taurus III throughout our live show, such as setting its LFOs rate (CC 35), and its LFO sync mode (CC 102) – to ensure that the LFO remains in time with the tempo of any given track.
MIDI note sequences are also sent from Ableton Live to my two synths whilst I play guitar, giving us a virtual fourth member in the band at times.
Program Change Messages
A cool feature in Ableton Live that we use extensively (and stumbled on by accident!) is having dedicated MIDI clips that send Program Change Messages to switch between different synth presets. This is achieved through editing the “Pgm Change” controls in a MIDI clip’s Notes box.

At the beginning of each track, dedicated MIDI clips send Program Change Messages to our synths to switch to the corresponding presets used in the track.
We’ve taken full advantage of this feature, so Ableton Live now changes synth presets using these Pgm Change messages in every track of our live show. For example, in the picture above, the circled “Pgm Change” message of Bank 1, Pgm 5, corresponds with the preset, User Bank 1, Pgm 5, on the Mopho x4 synth.
Note that these values (for example whether there are sub-banks) do vary between hardware devices; it’s worth checking out your instruments’ manual to see how Program Changes are employed if this is something you’d like to have a go at.
That’s it from me for this 3-part series looking behind the scenes of our on-stage setup with Ableton Live! Thanks a bunch for reading. If you have any questions about anything in the blog, or anything else, hit me up through Panama’s Twitter or Facebook…or better yet, hit up the gurus at Liveschool!
Check out Part 1 “Performance Fundamentals” and Part 2 “Hardware vs Software” in this series from Tom Marland on Panama’s live setup.
Subscribe to our newsletter to keep up with our latest free tutorials, samples, video interviews and more.
Learn more about Producing Music with Ableton Live.
